Tag: Creativity

Western theme VBC

This year, our church used the “SonWest Roundup” VBC curriculum from GospelLight. The guy who usually paints the VBC backdrops had sprained his wrist, so I got asked to do it. I came up with some ideas early on, but then procrastinated until just a couple weeks before to actually take the time to go and paint.

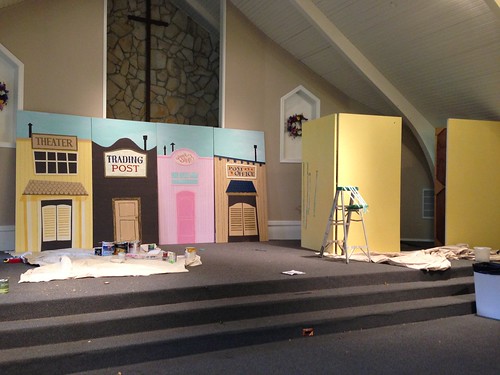
The illustration style I was going for came from the town graphics in the curriculum, but I wanted to make them less pastel and more earthy, but still fun and quirky. In the weeks leading up, I kept visiting Ace Hardware’s “oops” paint area, but they just had really odd colors. The day before I had planned to go paint, I found awesome shades of light blue, a warm yellow, dark brown, and beige — exactly the shades I was thinking of using!

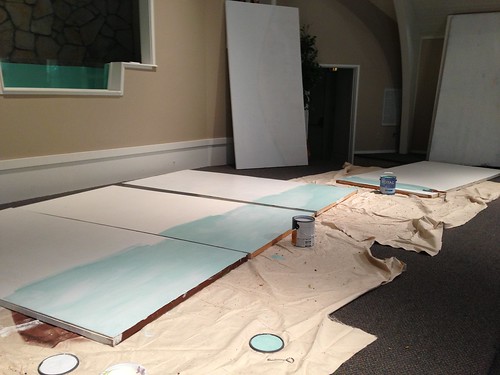
I started with the sky:

IMG_8093

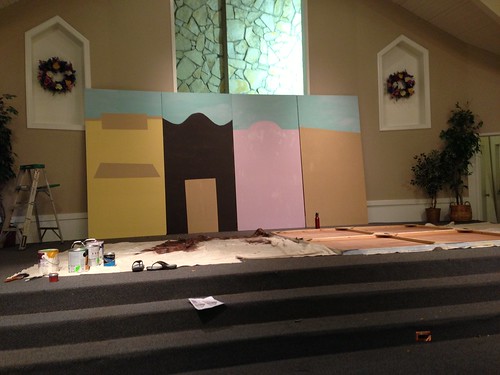
Then, I used painters’ tape to make straight edges for some of the buildings (I freehanded the curves).

IMG_8094

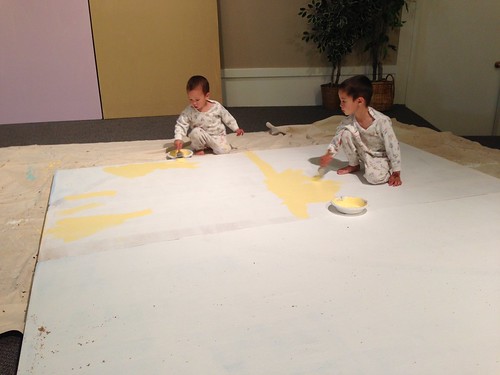
Steve brought the boys over to have lunch with me. They brought their painting pajamas to “help” me paint, which meant my productivity went down 90%.

IMG_8100

After they left, I was able to get more of the details done:

IMG_8108

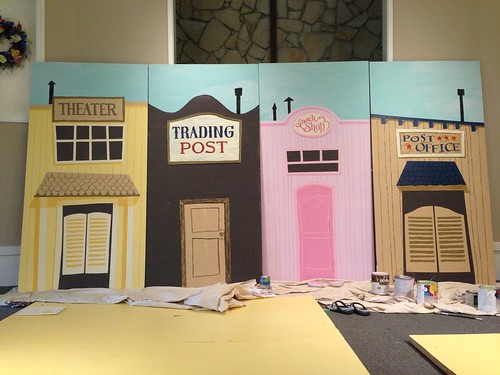
The next day, I finished up the details. I was really happy with the shadows on the Theater.

IMG_8112

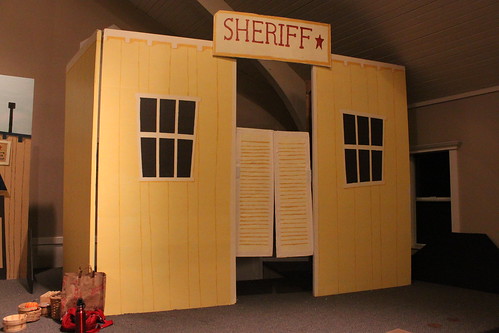
The yellow panels that the boys had helped me paint got put up on the side of the stage:

IMG_8113

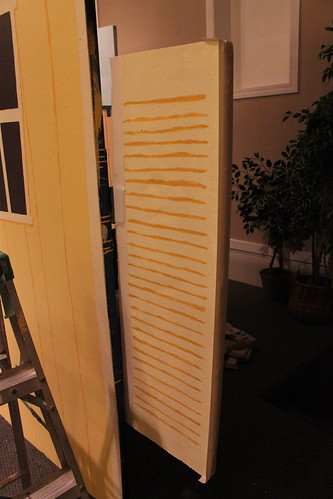
And I painted them more to turn it into a life-size sheriff’s office, complete with foam-board sign up top and foam-board swinging doors.

IMG_5858

My initial duct tape and hinges job only lasted one night before falling off, so they had to get screwed on.

IMG_5855

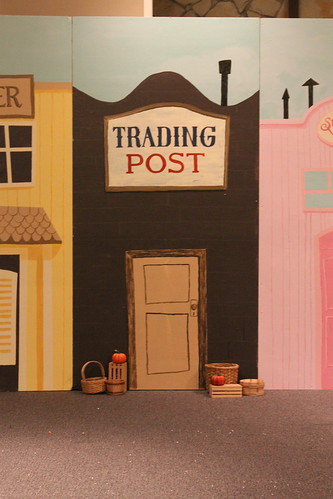
Finally, I hit up a thrift store and found smaller-sized baskets, mini crates, and even a mini wine barrel half to put outside the trading post.

IMG_5868

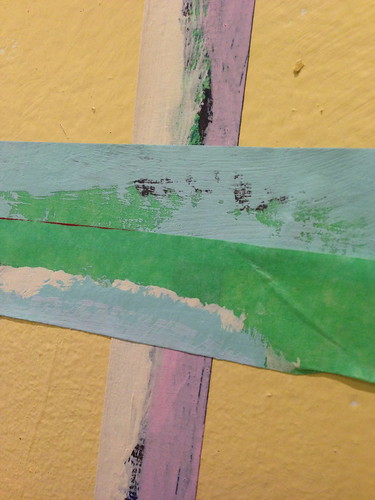
One challenge I ran into was that I started running out of painter’s tape, which I was using to help mask the windows — the shapes, “panes,” and trim. I ended up reusing tape over and over again. The original paint was green, and you can see how many layers of paint I have below!

IMG_8114

The rest of the team came in and did their magic. Other volunteers created the stagecoach image; signs were hung out; fences and hay bales added; and lots of butcher-paper silhouettes were taped to the walls. Here’s what the final room looked like:

IMG_5978

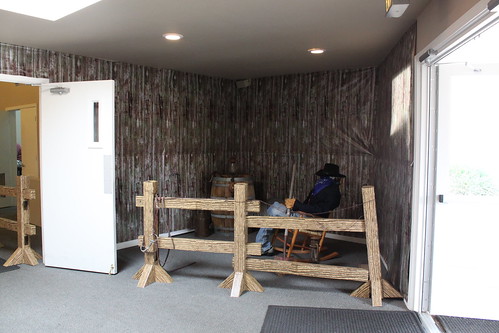
The entryway had a life-sized wine barrel and our chicken-wire mannequin in a rocking chair. (The mannequin shows up in the decorations somewhere every year, and never fails to creep us out when we’re working on decor in the late night.)

IMG_5970

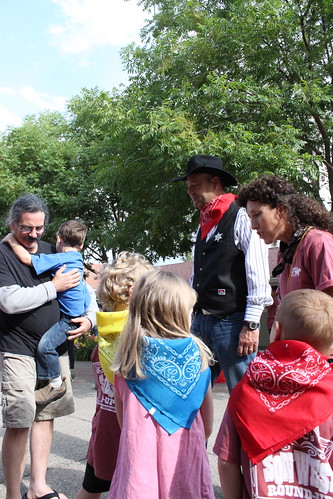
The week of VBC was a blast for all the volunteers and kids. The volunteers all dressed up with the western theme – good thing cowboy boots are “in” right now!

IMG_5972

IMG_5968

The cooking team made fun snacks every day. The first day, they made bagel “wagon wheels.”

IMG_5985

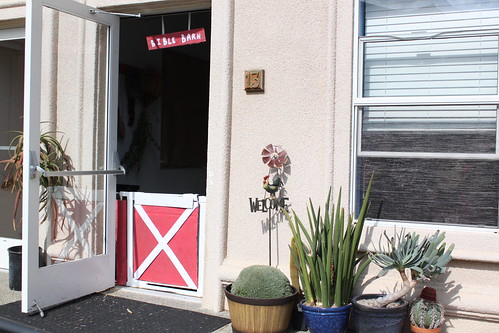
A few other places on the campus were decorated, too — specifically, the “bible barn.” I loved that they had succulents and plants brought in for the outside!

IMG_6013

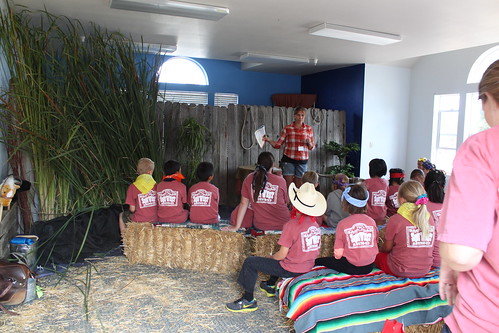
The inside had hay bales for seating (I cringed when I looked at the floor and thought about clean-up), play horses corralled in a corner, and a wooden fence as a backdrop.

IMG_6014

A good time was had by all!

Turning a church into Disneyland

Those of you who have followed this blog for a while may remember the post I did a few years ago about the big New Year’s Eve event that my church puts on for junior high and high school students. We’ve continued to help out every year, and this year was the first time that I was officially in charge of decorations. With butcher paper, duct tape, push pins, cardboard, and a lot of help, we transformed one of the rooms at our church into Disneyland – or, “Bashland,” as we called it.

I’ve posted a few pictures below, but if you want to read all the details about the prep (with another post about the actual event to come), please head over to my personal blog for the full story!

The foyer, decorated as Main Street:

IMG_3238

IMG_3240

I painted the castle for the backdrop:

IMG_3269

The full stage:

IMG_3273

Toontown:

IMG_3258

Critter Country with Splash Mountain:

IMG_3226

Advetureland (specifically Tiki Room-inspired):

IMG_3288

New Orleans Square/Pirates of the Caribbean:

IMG_3316

Read more at my personal blog.

Homemade Christmas presents

This year for Christmas with Steve’s family, we drew names of individuals (children, even unborn children, included) for Christmas gifts. For some reason someone then had the bright idea of adding the further restriction that gifts had to be homemade/handmade.

Steve and I were in charge of three gifts: Steve drew his aunt, I drew Steve’s nephew, and “the baby” drew his future uncle. We ended up doing quite a bit of teamwork on all the presents.

Steve’s nephew is seven years old. I forget whether Steve or I had the idea first, but we came up with building a wooden treasure chest. I looked online and found some cool kits, but shipping was prohibitive, so we decided to build our own!

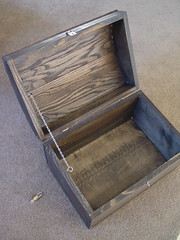
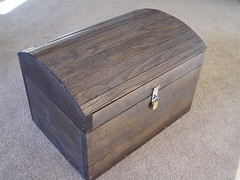
Treasure Chest plan I sketched out a rough plan with dimensions and we went shopping for wood and materials. Our good friends who live a few doors down have all kinds of tools including a table saw, jigsaw, etc., so we went over and spent two weekends cutting the wood, putting it together with wood screws (main frame) and nails (top slats), staining it, and adding hinges, a chain on the inside to keep the lid from opening too far, and a latch and small padlock. We read some stuff on making real wood joins but it seemed too complicated for the short timeframe we were working with (plus the fact that neither of us had any experience making wood joins!), and let’s face it, we didn’t think a seven-year-old would care! Steve and I pretty much worked equally on the chest together even though it was technically “my” project.

Given that this was my first real experience using power tools and building a “real” item out of wood and that we made up our own plans, I thought the chest turned out really great! Here are a few photos, you can see the rest on Flickr:

Open treasure chest Treasure chest Treasure chest closeup

Next, we attempted to make wooden pens for Steve’s aunt and brother-in-law. My sister’s husband has a lathe and other tools necessary for making wooden pens in addition to a lot of the wooden blocks (called “blanks”), so I went online and bought two pen kits — the metal pieces that make up the rest of the pen. We then spent three weekends driving out to their house to use his tools. Unfortunately, I had apparently picked a style of pen kit that was complicated to work with, and my brother in law didn’t have any experience with that type and couldn’t help us. After using up about 5 different blanks and being generally unsuccessful, we got frustrated with the whole thing and decided to think of alternative homemade presents to give!

Steve was stuck for a while on what to do for his aunt until his mom suggested that we make her a shadowbox. We couldn’t have done this without his mom, who spent some time pulling out old photos for us to use. Steve ended up focusing on photos of his mom and aunt. I pulled out various materials and arranged them in the box for him to pick from and he made executive decisions on what to include. I handled most of the assembly, although Steve trimmed the photos and bored the holes in the side of the cardboard frame for the clothesline. He also picked out the small picture frame and we used a more current photo. (I’m really into the frame-within-a-frame idea.)

Here’s the final result. It’s interesting how cameras differ from the human eye — the ribbon shows up much more “orangey” in this picture; in person, it looks like the same shade as the red dresses in the main photo.

Shadow box

Two down, one more to go. I was having some problems coming up with presents for the baby to give our brother-in-law. Thinking about our former success with wood, I thought about making a mancala game with a wooden board that could fold in half and latch to be “travel-friendly” and even bought some materials, but returned them all as I didn’t think it was that great of an idea and might just end up collecting dust in the long run!

As the day drew near, I finally decided to do a two-part present. I ordered a photo calendar through Costco, uploading family pictures and adding family birthdays and anniversaries. Then, I spent the weekend before Christmas making homemade chocolate-covered gummy bears, his favorite sweet snack. It was a little time-consuming but pretty easy to do — we slowly melted chocolate chips in the microwave, stabbed gummy bears with toothpicks, and swirled them around in the chocolate. I put them in a large Coke glass, found at a thrift store — our brother-in-law has some Coke paraphernalia that he’s collected over the years — and wrapped it all up with holiday-colored plastic wrap.

Chocolate covered gummy bears

While it was at times stressful and frustrating, we found that making presents for a few individuals was overall a very rewarding experience for both the giver and the receiver!

Creativity tools

Two creativity tools have come across my way recently that I’m excited to start using.

Wreck This Journal – This book – journal – grown-up coloring book – creative tool by Keri Smith recently arrived at my home after I read about it at DIYPlanner.com. Each page has instructions that you can interpret and follow, such as “fill this page with circles” or “drip something here.” If you’ve ever had a pristine Moleskine that you didn’t touch for years, this is a book that gives you free license to ruin it, scribble in it, and actually use it to stimulate creativity. The blog (linked above) has a gallery of photos from people who have used this book and more information about the book itself, which you can find at any major bookseller.

The Majency Oracle, Deck 1 – James Bickers sent me an email to let me know about this free deck of creative prompts (and I see that Dave has already plugged it, but I’ll jump on the bandwagon). Each card has a short phrase, meant to jog your mind into creating a story or image around it that you can then run with in your creative medium of your choice. The zip download comes with a PDF of ready-to-print 3×5 cards; they look pretty, and did I mention that they’re free? (Of course — if you do find these useful, I’m sure James would appreciate a small donation!)

If you’ve used any cool creativity tools, please share them in the comments!

Weekend painting – Frog mural

This weekend, some of my friends and I helped to paint a room. Julie invited us to help her paint her spare room for her nephew with a fun blue-green color scheme and said that she was thinking of doing some kind of mural, as well, with a quote from Guess How Much I Love You: “I love you to the moon and back.”

Here was the final result:

Mural

I must brag about my creative friends — Holly, who designed the mural and did the frogs (with some “fill in” help from Julie), Julie, who painted the moon, and Liz (a.k.a fellow baby shower decor designer), who came up with the idea for the stripe of blue around the rest of the room and was our general manager for the day. My bragging rights come in from doing the lettering and painting the lily pad. We all prepped the room together and painted in stages; both colors needed two coats and we had to wait for the blue to dry before taping it off to do the green. The blue bled a little bit behind the painter’s tape; I figured out that if we cut in the edges of the green very carefully with a paintbrush instead of simply rolling over it, that problem could be avoided — and it worked!

It took about eight hours (with a short break for pizza) from start to finish, and we were all very pleased with it by the end. Except for Julie’s nephew, who was just slightly disappointed that Holly didn’t have time to make a dragon on the other wall, too, as planned…

Announcing Custom Shadow Box

I am very very very excited to announce that my new “side business” is finally opening its virtual doors. VERY.

Introducing Custom Shadow Box at www.customshadowbox.com!

Custom Shadow Box web site

Business plan? What business plan?

The [rather uncreatively named] business is meant to be a side project for me. I enjoy working with my hands, and this is an opportunity to try to get some additional income while doing something else I love. I’m not expecting a high volume of orders because of the price point, so I expect to show a loss at the end of this year (for the shadow box side business part, anyway). The startup costs weren’t high, but I did invest a nice chunk of change into professional photography in addition to fictitious name filing fees.

Nevertheless, this has been a great (albeit sometimes frustrating) way to learn about selling tangible product in California, which involves getting a reseller license, dealing with sales tax, and all that fun stuff. Making the web site was also a great learning opportunity. More about that in a bit.

Beginnings

First shadow box
It started with a wedding present given to my sister back when she got married. A friend had arranged the invitation artistically in a small shadow box with silk floral accents that matched the colors of the invitation. I always thought it was a cool idea, but it wasn’t until my coworker got married that I finally tried it out. Their invitations were wrapped in orange vellum with a gorgeous patterned ribbon. My coworker had gerbera daisies in her wedding, so I picked some silk flowers that matched the invitation and put it together.

Fast forward to sometime last year. I was brainstorming ways that I could develop alternative streams of income. By this time, I’d created some shadow boxes to display my own wedding photos and invitations and created a couple more for other friends, as several of my friends were conveniently getting married. I played with the idea of making custom shadow boxes for money and sketched out some pricing ideas. Come 2007, I decided that one of my main goals for the year would be to get this new business idea up and running.

Process

First, the logo. Below, you can see the logo evolution. I started with a simple 3D box shape created in Illustrator and eventually made the frame “thicker” to give it some depth. While I liked the inner shadow effect (large upper right), I eventually moved the shadow in front of the box so that I could do cool things with Jason Gaylor-inspired flowers. I liked my original wild tangle of flowers (third row left), but when reduced to logo size it was too hard to tell what they were (my sister Angela’s feedback), so I simplified the shapes for the actual logo itself. I didn’t want the time I spent on the crazy flowers to go to waste, however, so you’ll see that they show up in other parts of the site.

Custom Shadow Box logo evolution

My original logo and web site design color was teal, but my graphic designer sister said that I should pick more neutral colors so that the site wouldn’t clash with my product pictures. Above you can see my attempts at choosing other colors. Eventually I figured out that it would work best to have the shadow box mark in one color and the text and the rest of the site to be in another color. I also made the page titles green to add some additional oomph (that’s a technical term, by the way).

Web site colors

The web site design went very smoothly. I used my wild flower mass as a page background and already had in mind the kind of feel and style I wanted for the web site, which I’d describe as clean and web 2.0-ish.

The web site development, on the other hand, was a fun learning experience and challenge:

  • I tried to use as-clean-as-possible HTML for the markup. I generally suffer from divitis so this was my attempt to use as few divs as possible. (Note – I don’t think the site validates 100% quite yet. Still working out some of the kinks.)
  • I bought DOM Scripting by Jeremy Keith and then completely redid the gallery page to use better markup, with a fancy Javascript file controlling the application of classes.
  • I also used DOM scripting to get the order page more interactive, with prices highlighting as you select options and the bottom invoice amount automatically updating as you “build” your shadow box.
  • I got to experiment with a totally new illustration style. More below.

There are still some challenges with the order page that I haven’t figured out how to deal with. There’s something about my script that won’t allow me to automatically put the focus on a text field after selecting a radio button (such as Calligraphy Options). Also, if you leave the page and then go back to the order form, the radio buttons are selected but the Javascript stuff has all been reset so the prices aren’t highlighted and the order total is “$0.” Not sure what to do about that either. If you’re a Javascript expert and would like to provide some tips or want to monkey around with my code, please do!

Shadow box photo
The next step was to get some product photography. I had put in some temporary pictures into my gallery of older shadow boxes I had created and photographed. Some of the photographs were okay (such as the one used on the home page which had removable glass) but the photos of black frames were generally not usable because of reflections on the glass. I chose Bonnie Anglin from Anglin Art and Design because of her experience with product photography, although I think I offered her a new challenge with photographing glass-faced picture frames! You can see her great results on the gallery page; she took all the photos except the first one and the third one.

At about this point, I also decided that I wanted to put some illustrations on the how it works page, which was text-heavy and boring. I didn’t think my typical comic style would work, so I contacted Paige Pooler to see if she was available. Unfortunately, she wasn’t, but I was inspired to try out a different style of illustration and see how far I could take it. You may remember my first attempts; that specific portrait ended up on my about page. The other illustrations took a while to complete because of a bout of procrastination, but I’m very very pleased with how they turned out. Notice that I managed to incorporate the wild-flowers in the illustrations as well. See the other illustrations on the how it works page.

Custom shadow box illustration

Using code culled from other projects, I finished up the web site by getting the order form to work, then actually shipped shadow boxes (long-belated wedding presents) to test the shipping price. US Priority Mail ended up being the most cost-efficient way to ship. I ordered boxes from Uline although I still need to find a source for bubble wrap (Office Max will do for now).

And this morning, I went live!

Next steps, and how you can help!

Things I still need to do:

  • research bubble wrap costs and find a source
  • create business card and brochure
  • create invoice template
  • finish baby shadow boxes for friends (need to add baby photo) and take photographs for gallery

How you can help:

  • Kindly spread the word! Word of mouth, blogs, anything will help.
  • Provide feedback about the general business idea, site, and price point.
  • See a typo? Let me know!

A Client Story: Teaching Photoshop

On Sunday, I visited a local toy store for some initial consultation. The husband-wife pair, who had taken over the store about a year ago, were going to add a bunch of inventory to their online store and wanted my help. I went in-person to observe their process so that I could see if I was the right person to help them or not.

The previous owner had put together an ASP web site linked to a database. As it turned out, the actual process of entering product information was pretty easy, just time-consuming. The big hangup in the process was that they didn’t know how to use or leverage Photoshop properly to create the web versions of product images.

I told them that they should find a cheap student to help them enter in product information but offered a half-hour of paid training to show them how to streamline their Photoshop setup. Rather than have me come back another time, they opted to have me do the training right then and there.

I created an action that would crop an image and save three versions for the web site. I showed them how to reorganize their product image folders so that they had two folders to use for “processing.” Then I stepped aside, had the husband sit down, and walked him through the magic of automation and batch processing. I also gave some other gentle tips for being more efficient with the computer in general — changing the Explorer view to “thumbnail” so that he didn’t have to try to remember the filename but could look at the picture visually, using the keyboard to flip through Photoshop commands instead of tedious point-and-clicking, how to Shift- and Ctrl-click multiple files at once, and uploading multiple files at once instead of three at a time. At the end of 30 minutes, his eyes were alight. “This is sooooo cool!!!! I can’t believe how much time this is going to save!” The energy and enthusiasm in the room were palpable.

This experience affirmed a relatively recent Thing I’ve been learning about myself: I like to design, but I love to teach. I like helping others to get better at things, get more efficient. I like sharing knowledge — and getting paid for it was nice, too. I’m not dropping all my current work to dive into teaching, but I can see myself moving more towards situations which would involve some teaching or training.